Moving Notice

Friday, October 28, 2005


Dear readers, I am no longer hosting my blog at blogspot anymore, got my own domain name and hosting - http://blog.miragestudio7.com. Please take note that I am not going to post anymore articles here, please bookmark the new address.

Here are some of the changes:
- Ads removed ( horray...) but for the moment only.
- Focusing only on art and design related issues
- Removed political and computer related articles.
- Images are all scaled down to save space
- Drop the "everyone's invited" catchline.
- Power by WordPress, more features.
- Remove all those annonying buttons, ( yeah!), for the moment only

What I hope for:
- Set up an architecture forum ( anyone care to help out?)
- Looking for contributors, email me at calvin_ngan [at]hotmail.com

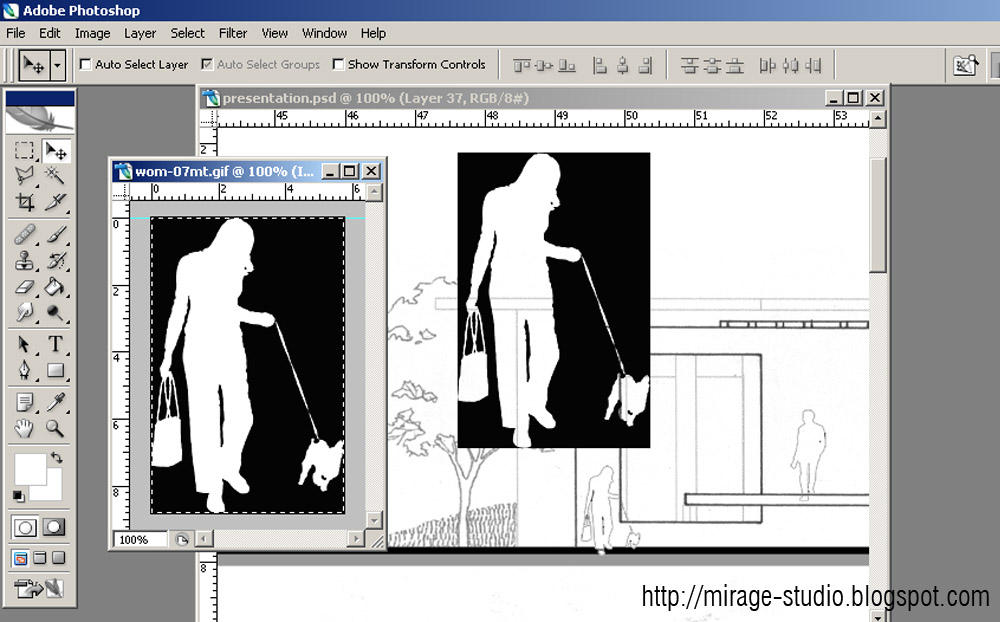
I hope my architecture tutorials would be beneficial to those whom are new in architecture computing, be it architects or student. Do link me back at the new address.


Evolution of Canon

Wednesday, October 26, 2005

Who would thought that the original canon logo features buddha as a symbol. Click here to learn more.


Photoshop Fire Technique

Tuesday, October 25, 2005

Creating the fire effect from an empty new template in Photoshop seems to be almost impossible, it require a very advance level of understanding of Photoshop and with years of experience. Greg – the webmaster for photoshoptechniques.com has found the solution. Creating the Fire effect shown at the image above is as simple as abc. Go to his website for a step by step fire technique tutorial on how to create the image above.


The Mad Poet

"From the age of six I had a mania for drawing the shapes of things. When I was fifty I had published a universe of designs. but all I have done before the the age of seventy is not worth bothering with. At seventy five I'll have learned something of the pattern of nature, of animals, of plants, of trees, birds, fish and insects. When I am eighty you will see real progress. At ninety I shall have cut my way deeply into the mystery of life itself. At a hundred I shall be a marvelous artist. At a hundred and ten, everything I do - be it but a line or a dot - will be alive."

-- Hokusai (1760-1849)

Reference
- Hokusai and Japanese Art
- Hokusai


Branding Dentist Creatively

Sunday, October 23, 2005


This must be the best dentist branded in the world. Design by Leo Burnett, Germany for a dentist named Kaia. What makes this branding unique is the ability of the client to capture the spirit of dentistry. Unlike most of the architecture firm around the world, professional firms like lawyers, engineers, accountants and dentist are usually dull and lack of design concept. By branding the dentist's clinic creatively, going to one would be a fun experience.


Photoshop + Image Masking

When it comes to presentation, inserting raster images of human and trees gives it an overall feeling of liveliness. The whole idea is to counter the mono tone feeling of line drawings, especially when it comes to presenting your work to someone who is not in the architecture line of field.

I have included a few of my collection in jpeg available for download at the end of this article. Each image shows a person on a white background and another one with a cut-out version. For those who are still relatively new to Photoshop or this is your first year as an architecture student, a step by step tutorial on how to insert the image into your presentation boards is available.


(1) Select (ctrl + a ) then copy (ctrl + c) the image and paste (ctrl + v) it into the presentation board from the source.


(2) Select the magic wand tool (press W) then click on the black area, to select multiple area hold down the ctrl key and click on multiple areas.


(3) Select all of the black colour areas then delete (press the delete key) or go to "edit" then select "clear" to delete the selected areas.


(4) Deselect the area by pressing (ctrl + d) or go to "select" then "clear".


(5) In the layer toolbox, right click on the selected layer then choose "Blending Option"


(6) In layer style dialog , under the styles category select "stroke", then put the line thickness to 1. By default the colour is red, change the colour to suit your presentation boards.


(7) Resize (ctrl + t) the image to scale, go to "edit" then "transform" and select "scale"


Creating a "cut-out" or "floating image" of any of the image objects supplied below is a simple 7 step process. The step by step tutorial above gives an overview of the whole process using Photoshop. Click on both the images below for a higher resolution. For cut-out version of trees browse to the previous post - Architecture Trees Sketches


Architecture Trees Sketches

Thursday, October 20, 2005

Instead of using all those normal dull AutoCAD trees in your presentation boards, perhaps hand sketched trees might somehow break the mono tone of the overall presentation. When it comes to presentation, hand sketches and drawings are far more impressive compare to a 3d MAX rendering, after all, old is gold.

Click on the image for a higher resolution and save it into your comp. Notes that the sketches above are not mine.